Active Quiz Flutter Setup
Getting Started
To set up and customize the Active Quiz Mobile App, you'll need to:
- Set up your Flutter development environment
- Configure the project and run it
- Change package name and app name as needed
- Integrate Firebase services
- Connect to your Admin Panel
- Customize the appearance and features
- Generate a release version for app stores
App Architecture
The Active Quiz Mobile App is built with Flutter, allowing for a single codebase that works on both iOS and Android platforms. The app uses Firebase for backend services, including:
- Authentication
- Cloud Firestore database
- Cloud Functions
- Firebase Storage
- Firebase Analytics
- Firebase Crashlytics
Connecting to Admin Panel
The mobile app connects to the same backend as the web version, managed through the Admin Panel. This ensures consistent data and user experiences across all platforms.
Flutter Setup
This guide will walk you through setting up Flutter for the Active Quiz App development.
Setting Up Flutter
Flutter is an open-source UI software development toolkit created by Google that allows you to build natively compiled applications for mobile, web, and desktop from a single codebase.
Installing Flutter
- Download Flutter SDK from flutter.dev
- Extract the downloaded zip file in a location of your choice (avoid paths with special characters or spaces)
- Add Flutter to your PATH environment variable
- Open a terminal/command prompt and run the following
command to verify the installation:
flutter doctor
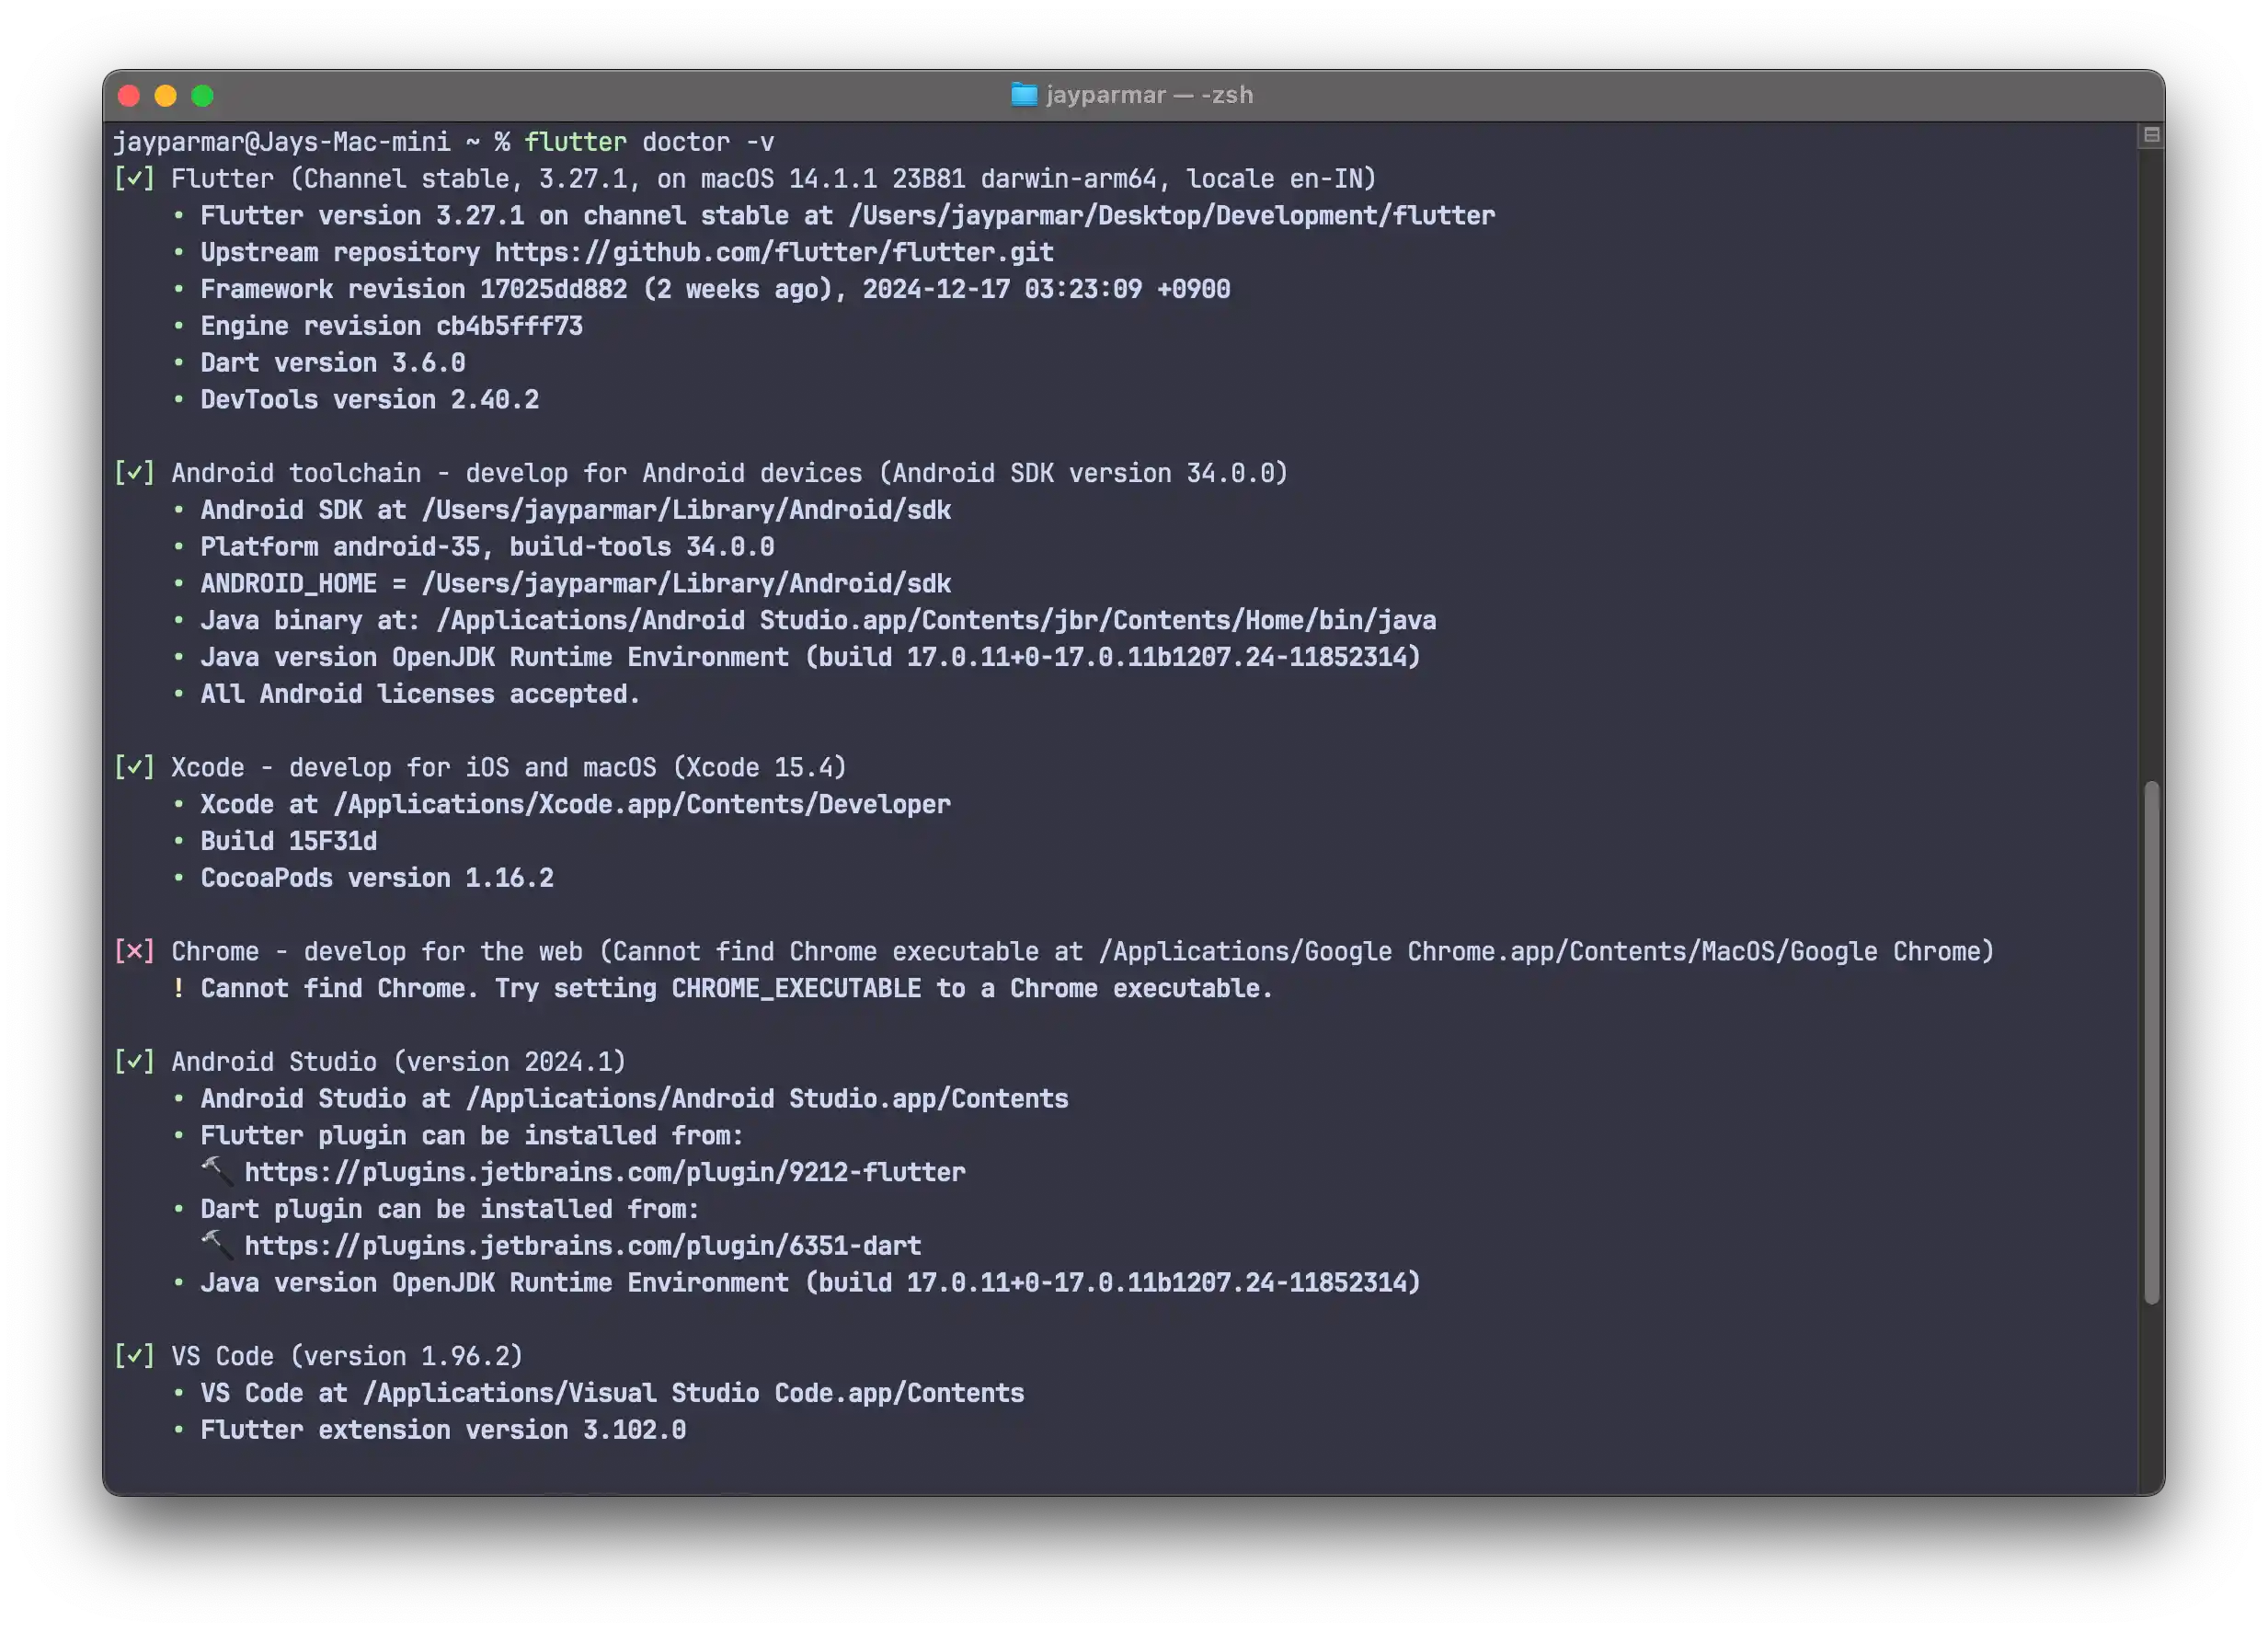
This image shows the output of the Flutter doctor command.
Setting Up an IDE
You can use any of the following IDEs for Flutter development:
-
Android Studio / IntelliJ IDEA (recommended):
- Install Android Studio from developer.android.com
- Install the Flutter and Dart plugins from the marketplace
-
Visual Studio Code:
- Install VS Code from code.visualstudio.com
- Install the Flutter and Dart extensions from the marketplace
Setting Up Android SDK
- Open Android Studio
- Go to SDK Manager (Tools > SDK Manager)
- Install the latest Android SDK
- Install Android Emulator or connect a physical device
Setting Up iOS Development (Mac Only)
- Install Xcode from the App Store
- Install the Xcode Command Line Tools
- Set up an iOS simulator or connect a physical iOS device
Running the Flutter Project
After setting up your development environment, you can now run the Active Quiz Flutter project:
- Open a terminal/command prompt and navigate to the project directory
- Run the following command to get all dependencies:
flutter pub get - Connect a device or start an emulator/simulator
- Run the project:
flutter run
Troubleshooting Flutter Setup
If you encounter any issues during the Flutter setup, try the following:
- Run
flutter doctor -vfor more detailed information - Follow the recommendations provided by the Flutter doctor
- Make sure your Android SDK and iOS development tools are properly set up
- Check your PATH environment variable
- Restart your computer after installation
App Configuration
After setting up Flutter and running the project, you'll need to customize the Elite Quiz App to match your requirements.
Changing Package Name
The package name (also known as application ID) uniquely identifies your app on the device and in the Google Play Store. You'll need to change it to your own package name before publishing.
Using Android Studio or IntelliJ IDEA:
- Open the project in Android Studio
- Right-click on the main app package (com.wrteam.elitequiz) in the Project panel
- Select Refactor > Rename
- Select "Rename Package" from the options
- Enter your new package name following the reverse domain name convention (e.g., com.yourcompany.yourappname)
- Click "Refactor" and confirm any prompts
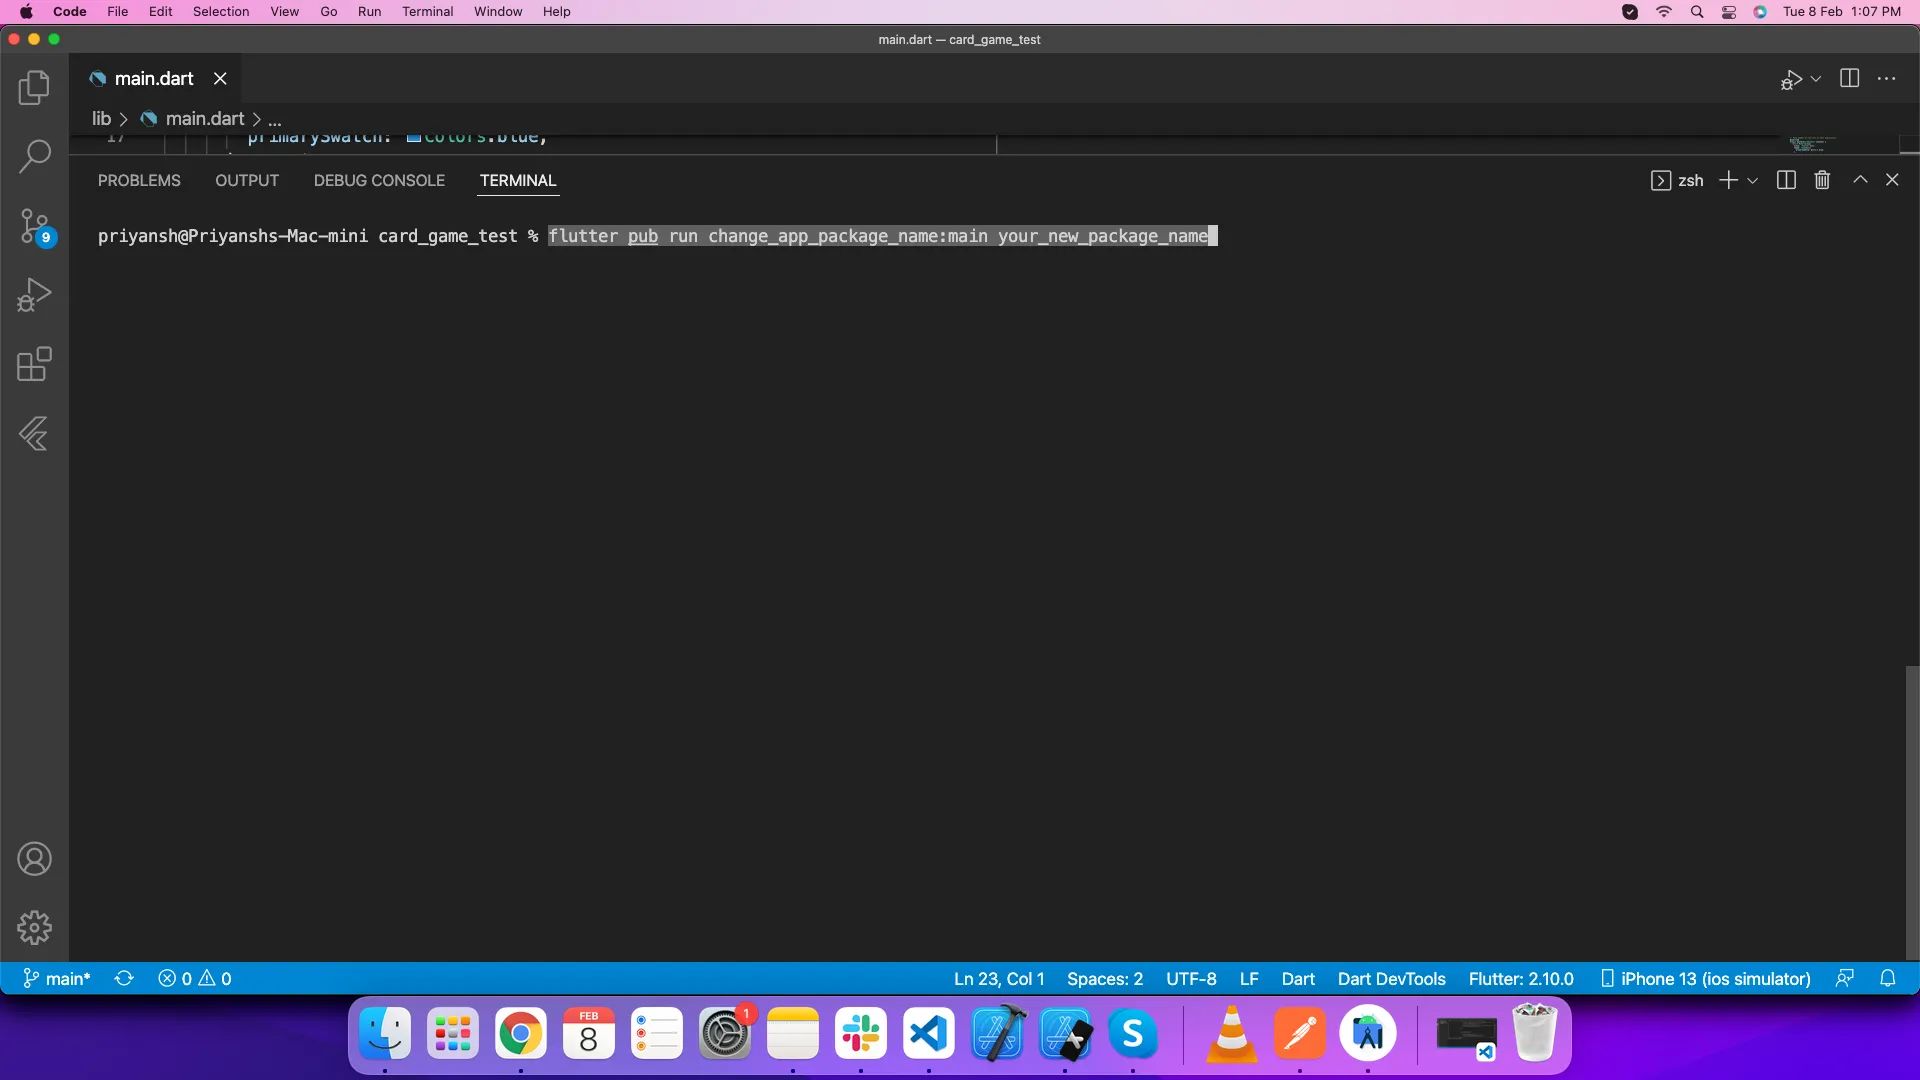
This image shows the refactoring process in Android Studio.
Alternative Method 1:
- Open android/app/build.gradle file
- Find the applicationId property
- Change its value to your desired package name:
            defaultConfig {
                applicationId "com.yourcompany.yourappname"
                // ...
            }
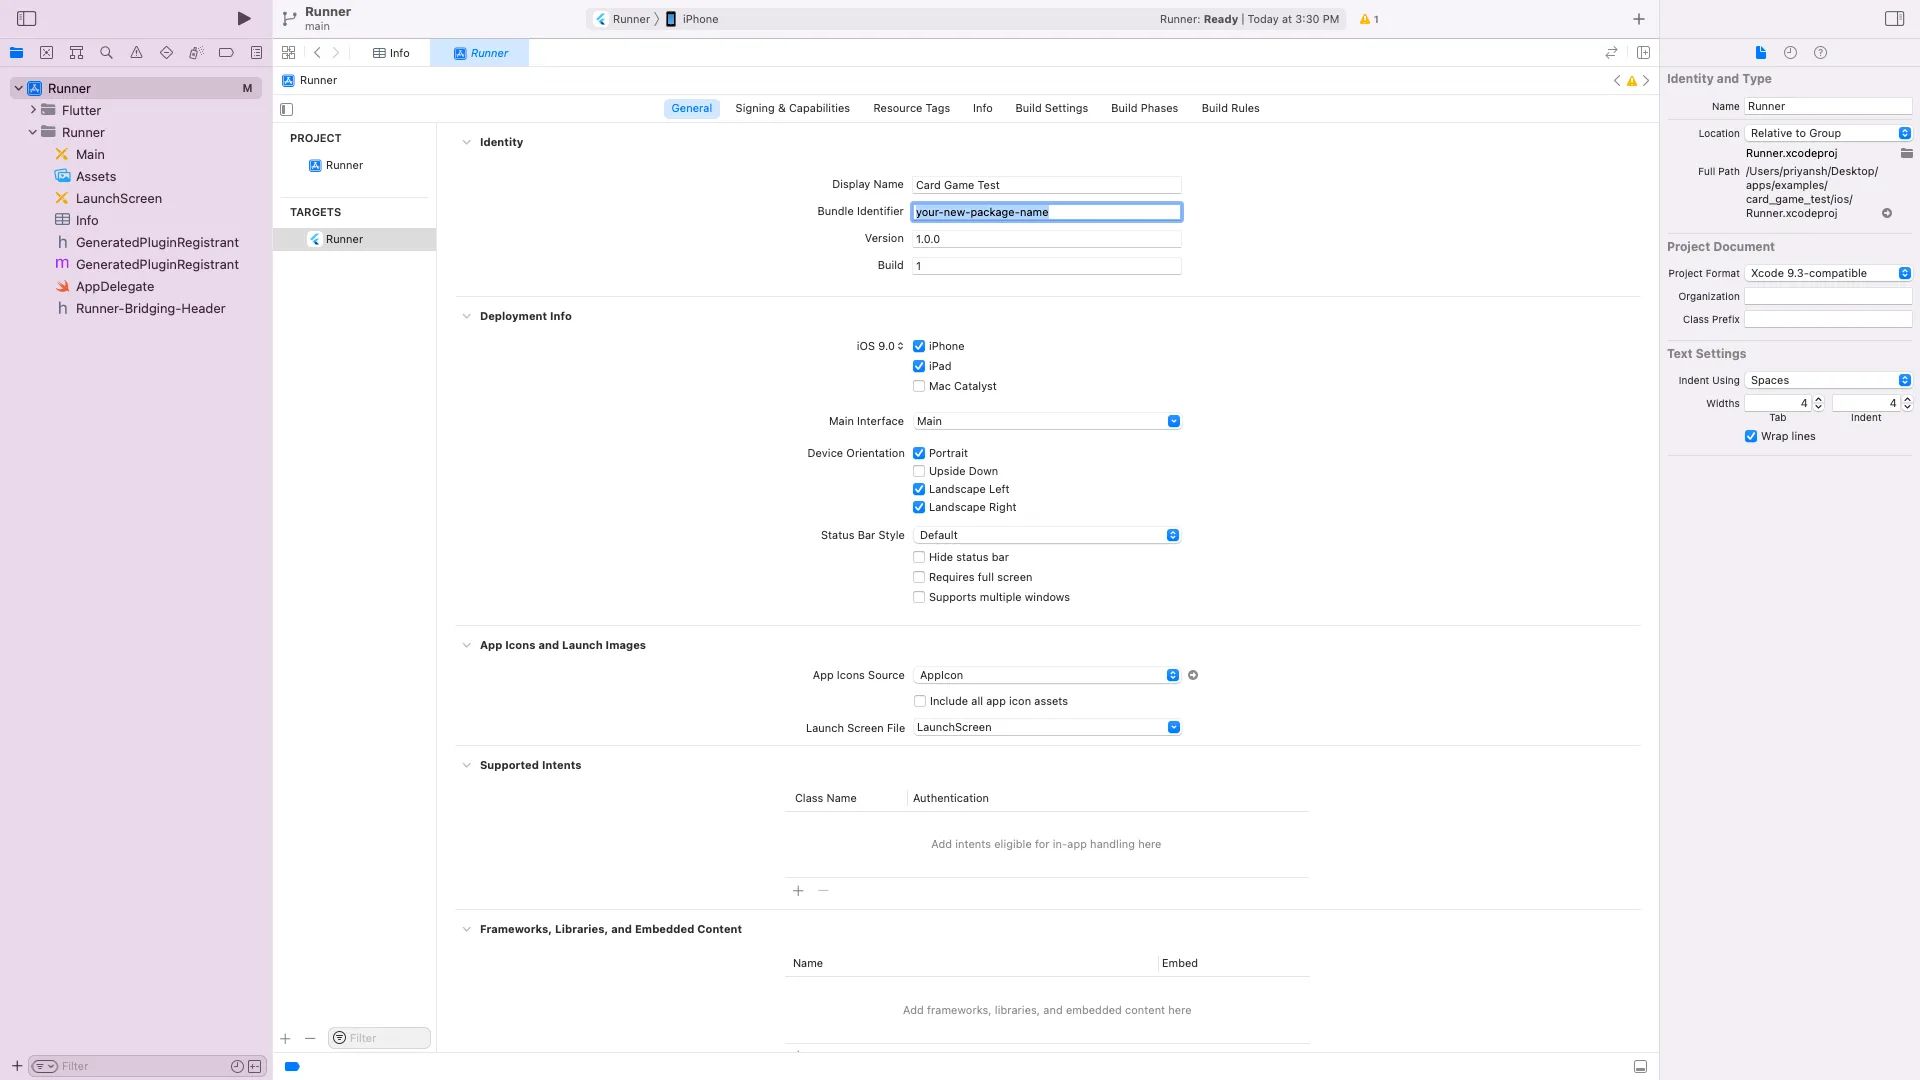
This image shows the Xcode configuration for iOS.
Alternative Method 2 (Manual Replacement):
- Open your project in Android Studio or VS Code
- Use the "Replace in Files" or "Find and Replace" feature
- Find all occurrences of "com.wrteam.elitequiz" and replace with your package name
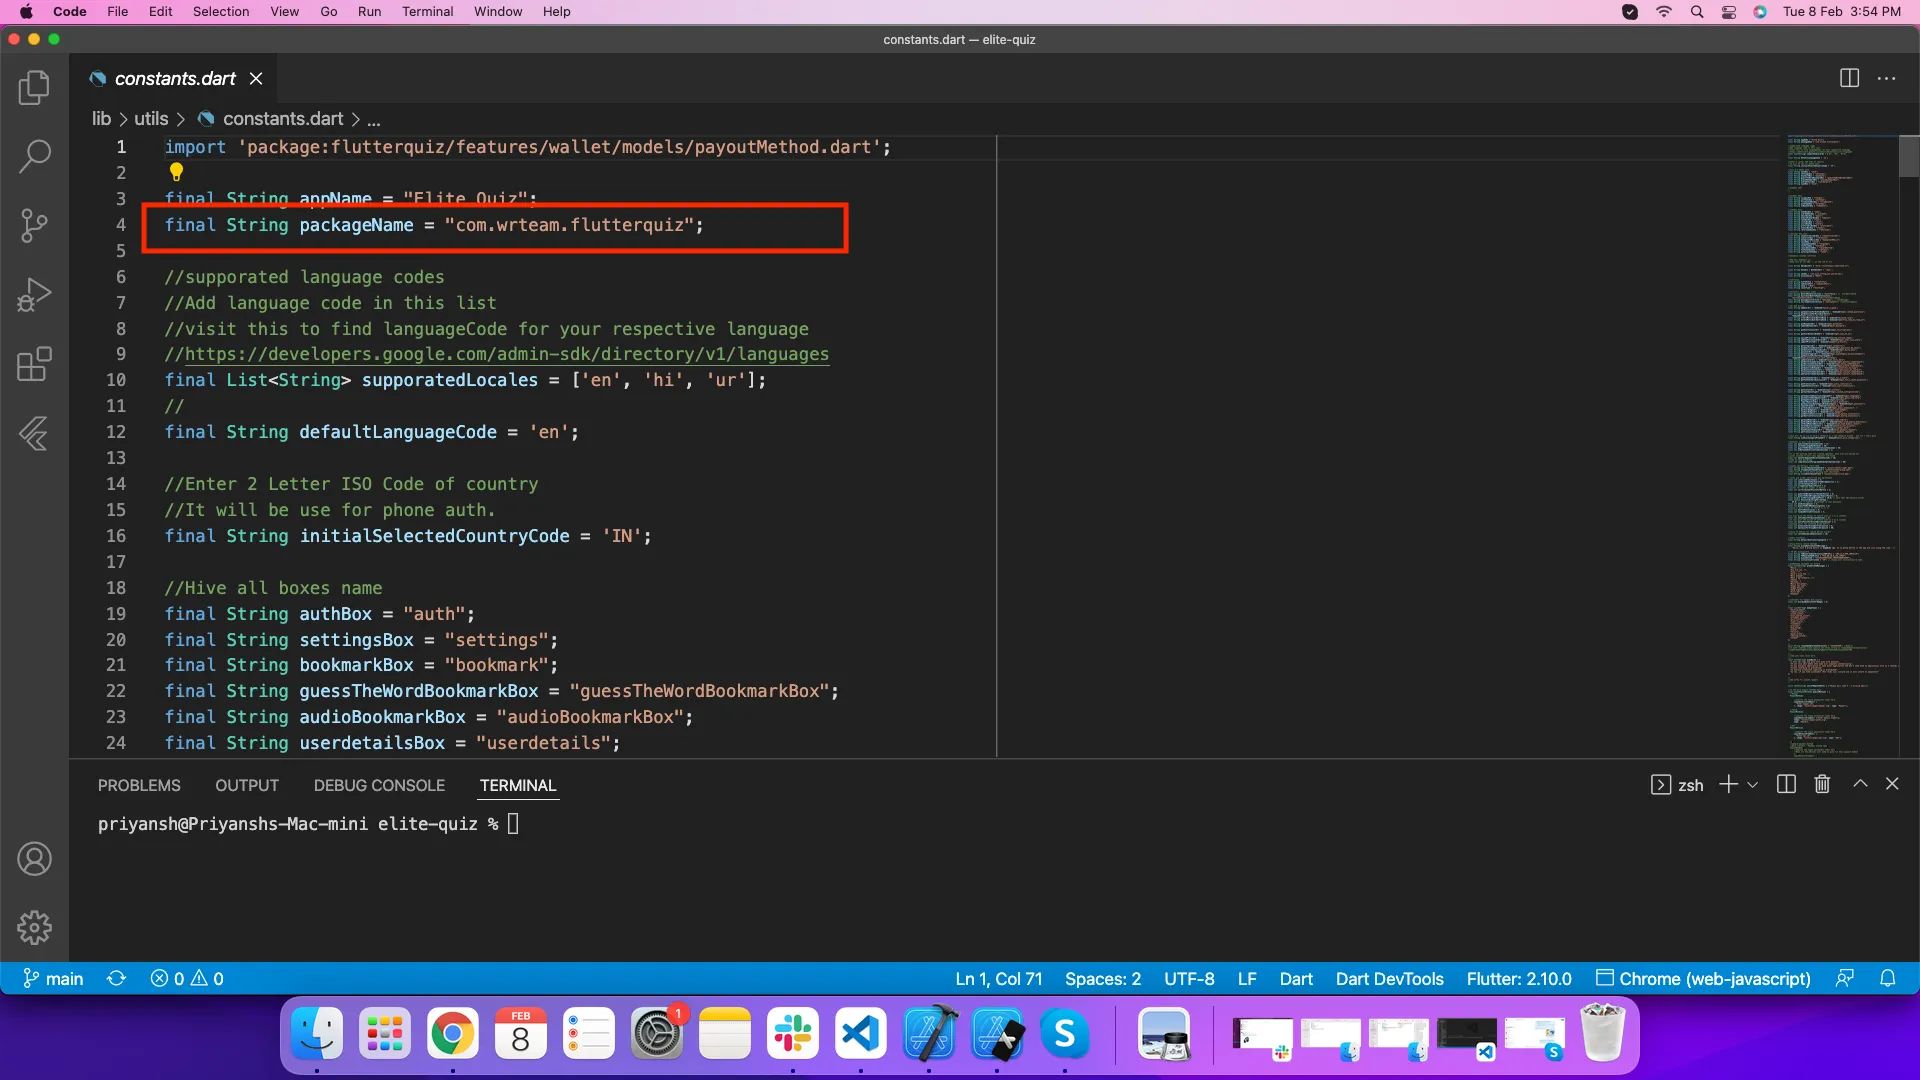
This image shows the find and replace feature in VS Code.
Changing Application Name
The application name is what users will see on their device under the app icon.
- Open the file android/app/src/main/AndroidManifest.xml
- Find the android:label attribute in the application tag
- Change its value to your desired app name:
                            <application
                            android:label="Your App Name"
                            ...>
- For iOS, open the file ios/Runner/Info.plist
- Find the key CFBundleName and change its value:
            CFBundleName
            Your App Name
Changing App Version
The app version is important for tracking releases and updates.
- Open the file pubspec.yaml at the root of your project
- Find the version property
- Update it to your desired version:
version: 1.0.0+1 # format is version_name+version_code
Where:
- The first part (1.0.0) is the user-visible version name
- The second part (1) is the internal version code used by the Play Store (should be incremented for each release)
Next Steps
After configuring these basic settings, you'll need to:
- Integrate Firebase services
- Connect to your Admin Panel
- Customize the app appearance
- Configure ads and in-app purchases
- Test your app thoroughly
- Generate a release build
Firebase Integration
Active Quiz uses Firebase for authentication, real-time database operations, and cloud storage. This guide will walk you through integrating Firebase with your app.
Add Firebase to Your Flutter App - Full Setup Guide
This guide walks you through integrating Firebase into your Flutter app using the FlutterFire CLI. The process is broken down into three clear steps:
Step 1: Prepare Your Workspace
Before diving in, make sure you've got all the essentials in place.
- Flutter SDK installed
- Firebase CLI installed
- Flutter Project created
Run the command below if you don't have one yet:
flutter create your_project_name
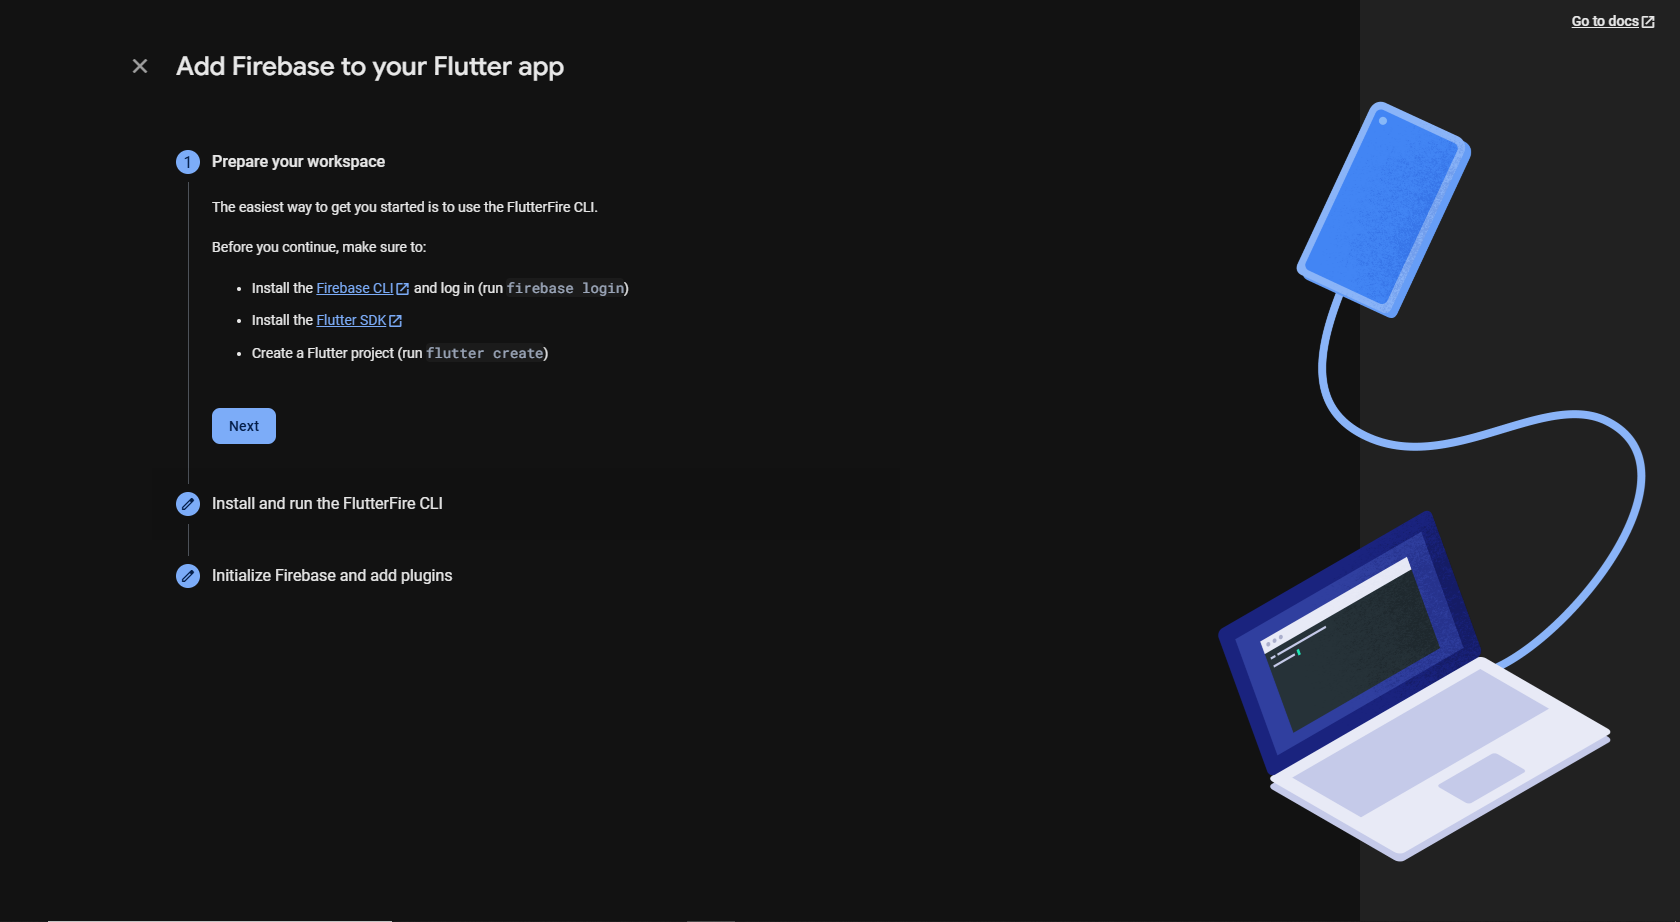
This image shows the setup instructions UI.
Step 2: Install and Run the FlutterFire CLI
This is where Firebase and Flutter shake hands.
- Activate the FlutterFire CLI globally:
dart pub global activate flutterfire_cli
- Configure Firebase for your project:
Make sure you're inside the root of your Flutter project:
flutterfire configure --project=
Example:
flutterfire configure --project=fir-db266
This will:
- Link Firebase with your app
- Generate lib/firebase_options.dart
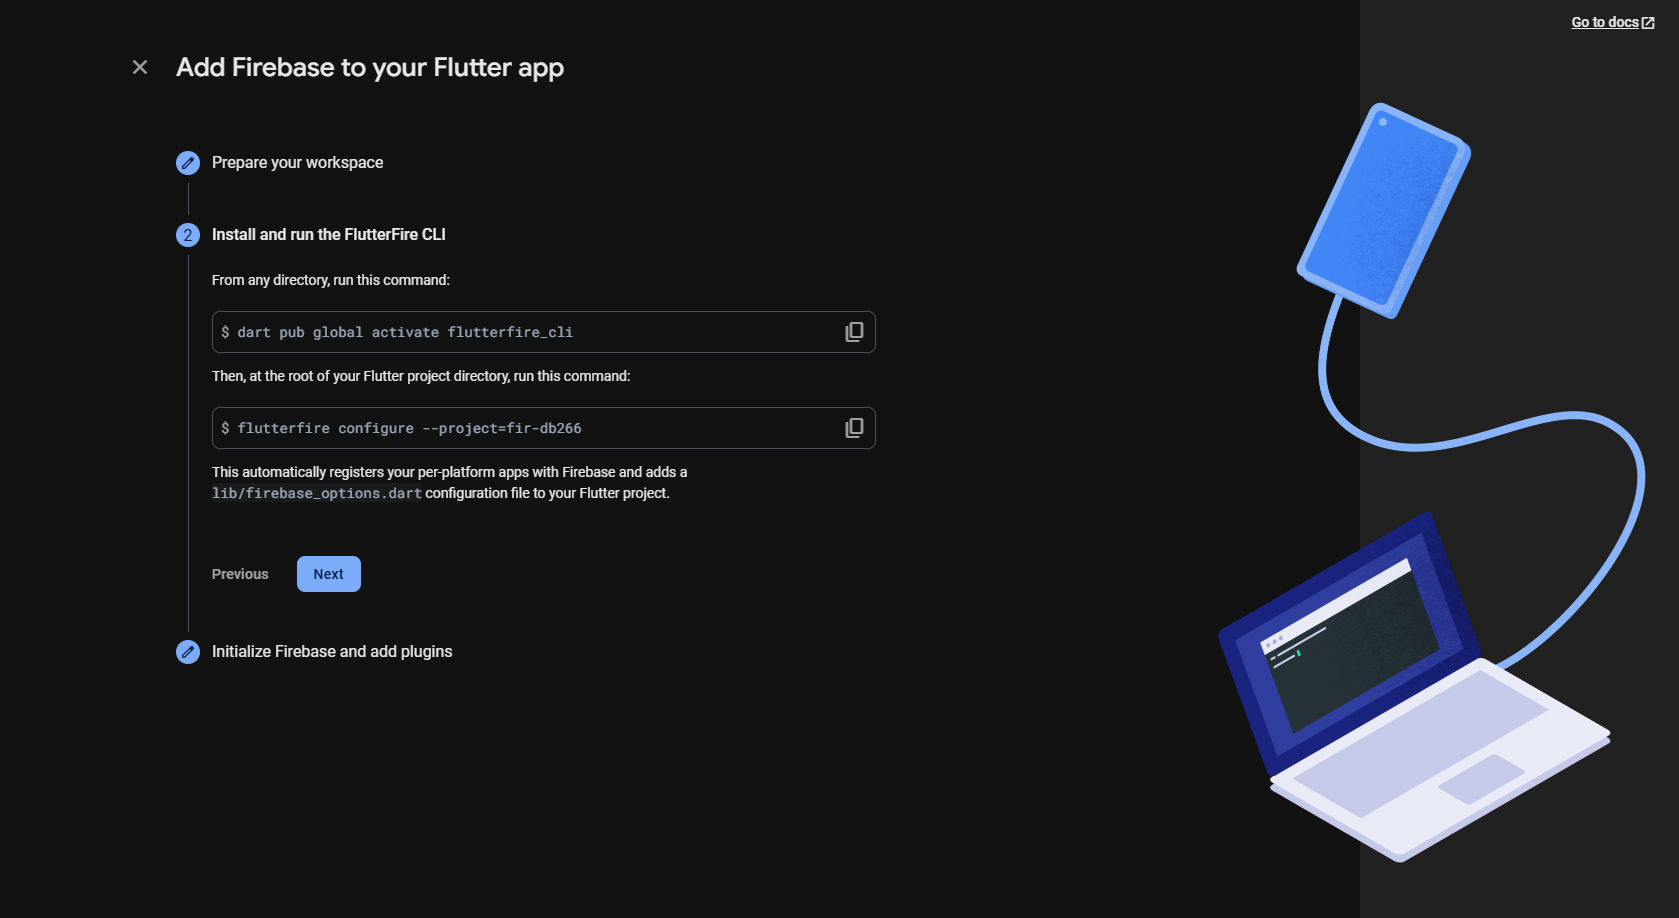
This image shows the CLI command screen.
Step 3: Initialize Firebase in Flutter
Note: the 3rd step is already done by the app developer, you'll just need to use the CLI commands given above.
Now let's wire it all together in the code.
Add the required dependencies:
In your pubspec.yaml:
            dependencies:
              firebase_core: ^latest
Then run:
flutter pub get
Update your main.dart:
            import 'package:flutter/material.dart';
            import 'package:firebase_core/firebase_core.dart';
            import 'firebase_options.dart';

            void main() async {
              WidgetsFlutterBinding.ensureInitialized();
              await Firebase.initializeApp(
                options: DefaultFirebaseOptions.currentPlatform,
              );
              runApp(MyApp());
            }
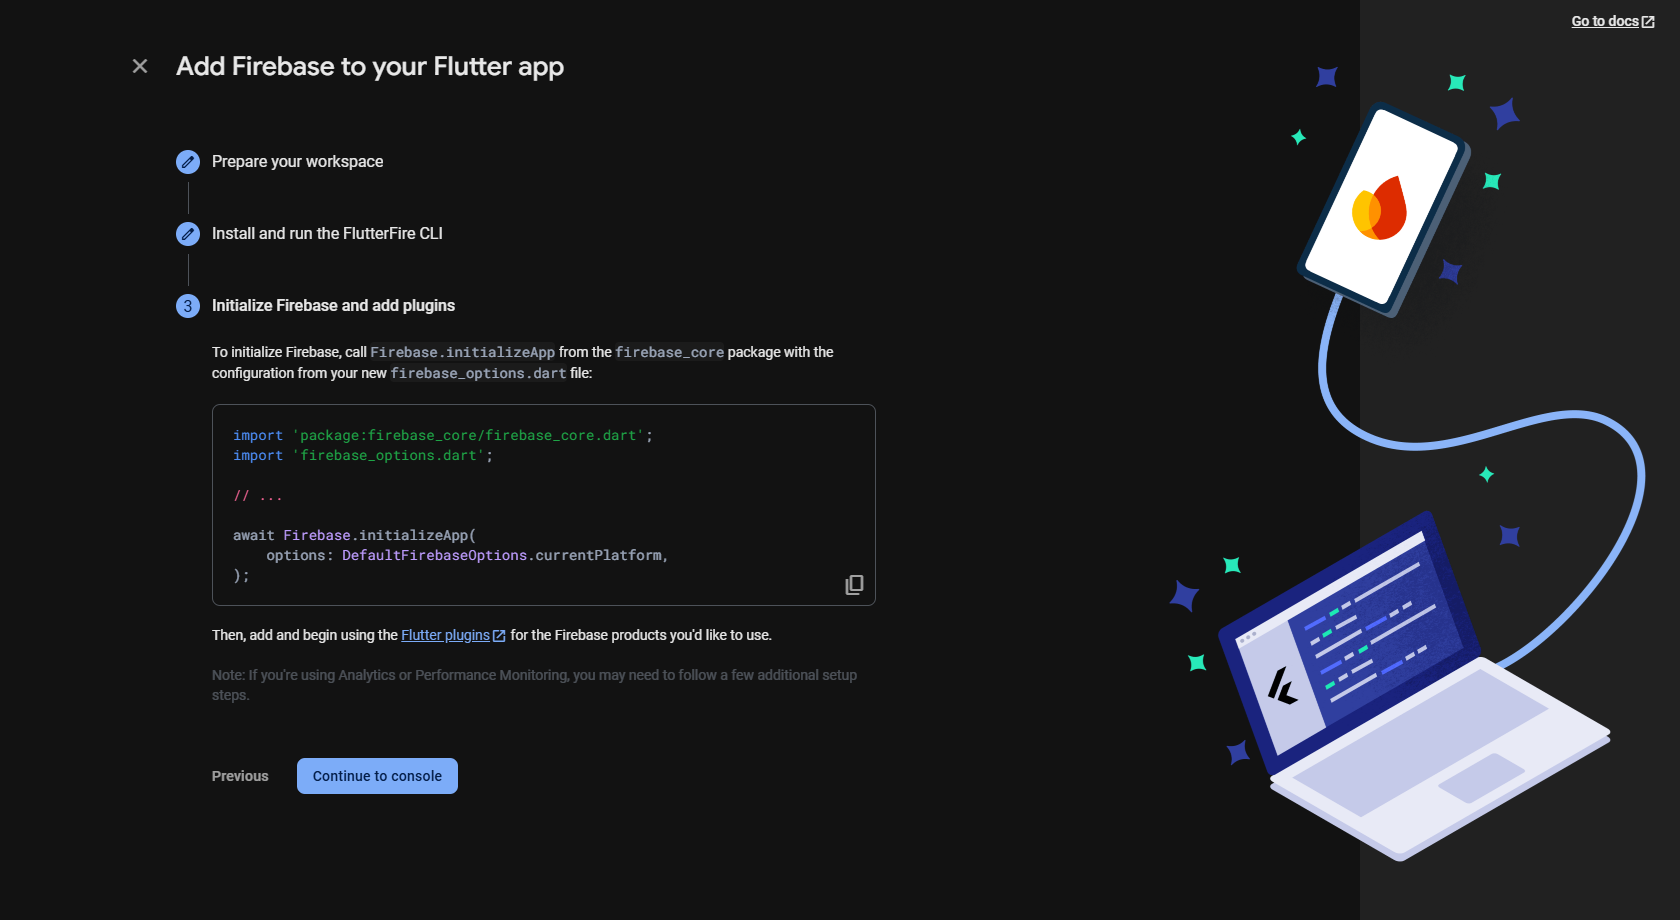
This image shows a code snippet from Firebase UI.
Enabling Firebase Authentication
Elite Quiz supports multiple authentication methods. Here's how to enable them:
- In the Firebase console, go to Authentication > Sign-in method
- Enable the authentication methods you want to use:
- Email/Password
Configuring Google Sign-In
Enable Google Sign-In in Authentication Sign-in methods. Make sure you've added your SHA-1 fingerprint to your Firebase project.
Connecting to Admin Panel
The final step is to connect your app to your Admin Panel:
- Open the file lib/src/utils/methods.dart in your project
- Look for the baseUrl constant and update it with your Admin Panel URL:
const String baseUrl = "https://your-admin-panel-url.com/api";
Make sure not to include the trailing slash at the end of the URL.
Testing Firebase Integration
After completing all the steps above, restart your app and test the following:
- Social authentication methods (Google)
If any issues occur, check the Firebase console logs and your app logs for detailed error messages.
App Customization
Customize the Elite Quiz App to match your brand identity and preferences.
Changing App Logo
You can customize the app logo that appears in the drawer menu and various screens:
- Navigate to assets/logo/ directory in your project
- Replace the logo.png file with your own logo (keep the same filename)
- Make sure your logo has the appropriate dimensions (recommended: 512x512 pixels)
Run the commands:
            flutter pub get
            flutter pub run flutter_launcher_icons:main
App Monetization Guide
Configuring Google AdMob
Active Quiz supports Google AdMob for displaying advertisements within the app. Follow these steps to set up AdMob:
Step 1: Creating an AdMob Account
- Go to AdMob.com and sign in with your Google account.
- Create a new app in the AdMob console or link to your existing app.
- Retrieve your AdMob App ID for both Android and iOS.
Step 2: Adding Ad Units
In the AdMob console, create the following ad units:
- Banner Ad
- Interstitial Ad
- Rewarded Ad
- App Open Ad
- Native Ad
Make sure to note down the ad unit IDs for each ad type.
Step 3: Enabling Ads in the App
- Navigate to your Admin Panel and go to System Settings.
- Locate the Android/iOS ad Setting section and enable the ad types you want to display (Banner, Interstitial, Rewarded, Native, App Open).
Step 4: Update Configuration Files
- For Android:
Open android/app/src/main/AndroidManifest.xml. Add or replace the AdMob App ID inside the
- For iOS:
Open ios/Runner/Info.plist. Add or replace the AdMob App ID:
            GADApplicationIdentifier
            ca-app-pub-XXXXXXXXXXXXXXXX~YYYYYYYYYY
Configuring Unity Ads
To configure Unity Ads for your app, follow these steps:
Step 1: Create a Unity Account
- Go to Unity.com.
- Click on Sign In (top right) and select Create a Unity ID.
- Verify your email by checking your inbox or spam folder.
Step 2: Set Up Unity Dashboard
- Navigate to the Unity Dashboard.
- Log in with your Unity credentials.
- From the sidebar, click on Monetization > Projects.
Step 3: Create a New Project (Game)
- Click Add Project.
- Enter the following details:
- Project Name (e.g., FlutterQuizApp)
- Choose Platform(s) - Android and/or iOS.
- Click Add Project.
Step 4: Get Your Unity Game ID
- Go to Monetization > Platforms.
- Choose your platform (Android or iOS).
- Copy the Game ID and use it in your Flutter main.dart.
Example:
- Android Game ID: 1234567
- iOS Game ID: 7654321
Step 5: Enable Ads (if needed)
- Navigate to Monetization > Placements.
- By default, Unity creates two placements:
- Video (non-rewarded)
- Rewarded Video
You can create more placements or rename existing ones as needed.
App Deployment
Once you've customized and tested your Active Quizzop app, the final step is to prepare it for deployment to app stores.
Generating a Release Version
Android Release
- Create a Keystore File:
keytool -genkey -v -keystore /key.jks -keyalg RSA -keysize 2048 -validity 10000 -alias key
- Create key.properties File:
- Create a file named key.properties in the android/ directory
- Add the following content (replace with your keystore details):
            storePassword=your_keystore_password
            keyPassword=your_key_password
            keyAlias=key
            storeFile=path_to_your_keystore_file
- Configure Gradle for Release:
The android/app/build.gradle file is already configured to use the keystore for release builds.
- Build Release APK:
flutter build apk --release
Or to build a bundle for Google Play:
flutter build appbundle --release
iOS Release
- Configure Xcode Project:
- Open the ios/Runner.xcworkspace file in Xcode
- Configure signing with your Apple Developer account
- Set the bundle identifier to match your registered App ID
- Set up Archive Configuration:
- Select "Generic iOS Device" as the build target
- Go to Product > Archive
- Build IPA File:
After archiving, the Xcode Organizer will open.
- Click "Distribute App" and follow the steps for App Store distribution
Publishing to App Stores
Google Play Store
- Create a developer account at play.google.com/apps/publish
- Create a new application
- Fill in all the required information:
- App description
- Graphics (icon, feature graphic, screenshots)
- Categorization
- Content rating
- Pricing & distribution
- Upload your APK or App Bundle
- Submit for review
Apple App Store
- Create a developer account at developer.apple.com
- Go to App Store Connect
- Create a new iOS app
- Fill in all the required information:
- App description
- Screenshots
- Keywords
- Support URL
- Marketing URL
- Privacy Policy URL
- Upload your build through Xcode or Transporter
- Submit for review
Post-Launch Considerations
App Analytics
Elite Quiz includes Firebase Analytics by default. To access analytics:
- Go to the Firebase Console
- Select your project
- Go to Analytics
Updating Your App
When you need to update your app:
- Make your code changes
- Increment the version number in pubspec.yaml
- Generate new release builds
- Upload to the app stores
- Consider using the force update feature for critical updates
App Store Optimization
To improve your app's visibility:
- Use relevant keywords in your app title and description
- Create high-quality screenshots and videos
- Encourage users to rate and review your app
- Respond to user reviews
- Update your app regularly
Troubleshooting Deployment Issues
Common Issues:
- Signing Issues: Ensure your keystore is properly configured for Android and your certificates are valid for iOS.
- Missing Permissions: Check the AndroidManifest.xml and Info.plist files for all required permissions.
- Play Store Rejection: Common reasons include metadata issues, privacy policy concerns, or functionality problems.
- App Store Rejection: Common reasons include UI guideline violations, crash on review, or metadata issues.
If you encounter any deployment issues, please contact our support team for assistance.
Frequently Asked Questions
General Questions
How do I change the app logo?
To change the app logo, navigate to assets/images/ in your project and replace the app_logo.png file with your own logos. See the App Customization section for more details.
How do I change the app colors?
Edit the color constants in the lib/utils/constants.dart file to match your brand colors. Check the App Customization section for more information.
How do I add a new language?
You can add new languages either through the admin panel or by adding new language files to the project. See the App Customization section for detailed instructions.
Firebase Integration
Why do I need Firebase?
Firebase is essential for several key features:
- User authentication (Google)
- Analytics and crash reporting
- Push notifications
How do I set up Firebase for my app?
Follow the detailed instructions in the Firebase Integration section, which covers creating a Firebase project, adding your app, and configuring authentication methods.
Monetization
How do I set up AdMob ads?
Create an AdMob account, generate ad unit IDs, and add them to your app. Enable ads in the admin panel. See the App Monetization section for details.
Customization
How do I manage badges in the app?
Badges can be managed from the admin panel:
- Go to Badges section in the admin panel
- Add, edit, or remove badges as needed
- Set the conditions for earning each badge
How do I modify battle messages?
Battle messages can be customized in the app:
- Open the file lib/utilsConstants.dart
- Look for the battle message constants
- Modify them as needed
Deployment
How do I generate a signed APK for Android?
Follow these steps:
- Create a keystore file
- Add a key.properties file to the android/ directory
- Run
flutter build apk --release
See the App Deployment section for detailed instructions.
How do I submit my app to the App Store?
Prepare your Xcode project, archive your app, and submit it through App Store Connect. See the App Deployment section for a complete guide.
Troubleshooting
My app crashes when logging in with Google
Ensure you've added the correct SHA-1 fingerprint to your Firebase project and properly configured the Google Sign-In settings.
How do I resolve "Failed to load AdMob ads" error?
- Check that your AdMob IDs are correct
- Ensure the AdMob account is properly set up and approved
- Test with test ad IDs during development
- Check if you've added the required permissions in AndroidManifest.xml and Info.plist
Firebase authentication is not working
- Verify that you've enabled the authentication methods in Firebase console
- Check that you've added the correct configuration files (google-services.json and GoogleService-Info.plist)
- Make sure you've added all required dependencies in pubspec.yaml
The app runs in debug mode but crashes in release mode
This is often due to code obfuscation or missing ProGuard rules. Make sure you've added the necessary ProGuard exceptions for any libraries you're using.
Getting Support
If you encounter issues not covered in this documentation, please contact our support team through:
- Email: activeithub@gmail.com
- Skype: See the Support section for Skype contacts